In this configuration guide, you will learn, how to install Tomcat on CentOS 7 or other Redhat based Linux distros. #centlinux #linux #tomcat
Table of Contents
What is Apache Tomcat? :
Apache Tomcat is an open source implementation of several Java EE technologies such as Java Servlet, Java Server Pages, Java Expression Language and Java WebSocket. Apache Tomcat provides a Java based web application server on which Java applications can be deployed and run. Apache Tomcat is developed by Apache Software Foundation released under Apache License 2.0.
In this article, we will install Apache Tomcat 9 on CentOS 7 and configure Application Manager to perform server administration conveniently. We recommend you to have Tomcat: The Definitive Guide (PAID LINK) by O’Reilly Media as reference during your Apache Tomcat journey.
Read Also: How to install Tomcat on Rocky Linux 9
System Specification:
We have provisioned a CentOS 7 virtual machine with following specifications.
- Hostname – tomcat-01.example.com
- IP Address – 192.168.116.144/24
- Operating System – CentOS 7.6
- Apache Tomcat – 9
Install OpenJDK on CentOS 7:
Connect with tomcat-01.example.com using ssh as root user.
Apache Tomcat 9 requires Java 8 or later JRE (Java Runtime Environment). Therefore, we will install OpenJDK 8 (an open source implementation of Java platform) on CentOS 7 machine.
# yum install -y java-1.8.0-openjdk-devel
Java executables have been automatically added to PATH environment variable. Therefore, we are only required to set the JAVA_HOME environment variable.
# echo "export JAVA_HOME=/usr/lib/jvm/java-1.8.0-openjdk-1.8.0.191.b12-1.el7_6.x86_64" >> /etc/profile
# . /etc/profile
# env | grep JAVA_HOME
JAVA_HOME=/usr/lib/jvm/java-1.8.0-openjdk-1.8.0.191.b12-1.el7_6.x86_64
Verify Java version.
# java -version
openjdk version "1.8.0_191"
OpenJDK Runtime Environment (build 1.8.0_191-b12)
OpenJDK 64-Bit Server VM (build 25.191-b12, mixed mode)
OpenJDK 8 has been installed on our CentOS 7 server.
Note: if you are using more than one Java versions on the same machine then you should read our previous article Install Java on CentOS 7 to perform additional settings using alternatives command.
Install Tomcat on CentOS 7:
If we install Apache Tomcat from yum repository, then we do not have to perform following steps manually. But Apache Tomcat 9 is the latest version and it is not yet available in yum repositories. Therefore, we have to install it manually.
Create a user to own Apache Tomcat 9 software.
# useradd -s /sbin/nologin tomcat
Download Apache Tomcat 9 binaries from Tomcat’s website.
# cd
# wget https://www-us.apache.org/dist/tomcat/tomcat-9/v9.0.16/bin/apache-tomcat-9.0.16.tar.gz
--2019-03-03 07:58:26--  https://www-us.apache.org/dist/tomcat/tomcat-9/v9.0.16/bin/apache-tomcat-9.0.16.tar.gz
Resolving www-us.apache.org (www-us.apache.org)... 40.79.78.1
Connecting to www-us.apache.org (www-us.apache.org)|40.79.78.1|:443... connected.
HTTP request sent, awaiting response... 200 OK
Length: 10783080 (10M) [application/x-gzip]
Saving to: âapache-tomcat-9.0.16.tar.gzâ

100%[======================================>] 10,783,080   414KB/s   in 17s

2019-03-03 07:58:44 (608 KB/s) - âapache-tomcat-9.0.16.tar.gzâ saved [10783080/10783080]
Extract downloaded tarball of Apache Tomcat 9.
# tar xf apache-tomcat-9.0.16.tar.gz
Move extracted directory to /opt/tomcat/.
# mkdir /opt/tomcat
# mv apache-tomcat-9.0.16 /opt/tomcat
Change ownership of /opt/tomcat directory.
# chown -R tomcat:tomcat /opt/tomcat
We will create a soft link latest for /opt/tomcat/apache-tomcat-9.0.16 directory. So, we can upgrade/downgrade Apache Tomcat conveniently.
# ln -s /opt/tomcat/apache-tomcat-9.0.16/ /opt/tomcat/latest
Create a systemd unit file to define a service for Apache Tomcat 9 server.
# vi /usr/lib/systemd/system/tomcat.service
and add following lines therein.
[Unit]
Description=Tomcat 9 servlet container
After=network.target

[Service]
Type=forking

User=tomcat
Group=tomcat

Environment="JAVA_HOME=/usr/lib/jvm/jre"
Environment="JAVA_OPTS=-Djava.security.egd=file:///dev/urandom"

Environment="CATALINA_BASE=/opt/tomcat/latest"
Environment="CATALINA_HOME=/opt/tomcat/latest"
Environment="CATALINA_PID=/opt/tomcat/latest/temp/tomcat.pid"
Environment="CATALINA_OPTS=-Xms512M -Xmx1024M -server -XX:+UseParallelGC"

ExecStart=/opt/tomcat/latest/bin/startup.sh
ExecStop=/opt/tomcat/latest/bin/shutdown.sh

[Install]
WantedBy=multi-user.target
Execute following command to notify systemd that we have created a new unit file.
# systemctl daemon-reload
Start and enable Apache Tomcat service.
# systemctl enable tomcat.service
Created symlink from /etc/systemd/system/multi-user.target.wants/tomcat.service to /usr/lib/systemd/system/tomcat.service.
# systemctl start tomcat.service
Allow Apache Tomcat service port in Linux firewall.
# firewall-cmd --permanent --add-port=8080/tcp
success
# firewall-cmd --reload
success
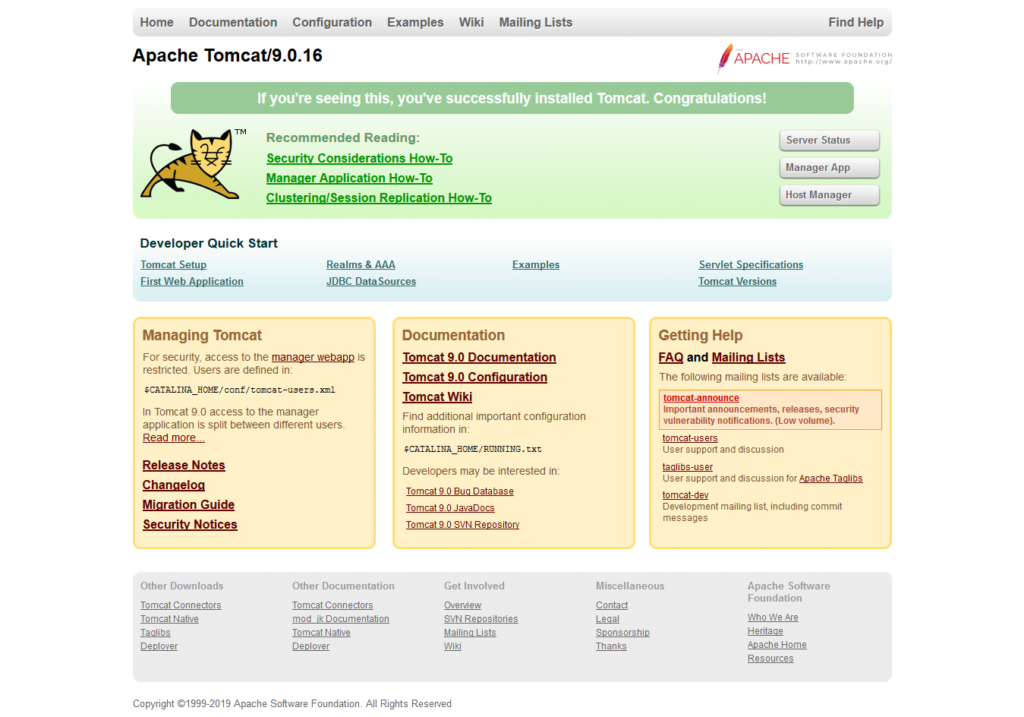
Browse URL http://tomcat-01.example.com:8080/ in a client’s browser.

It will show the default homepage of Apache Tomcat 9.
Apache Tomcat 9 has been installed on our CentOS 7 server.
Configure Tomcat Application Manager:
Application Manager is installed by default with Apache Tomcat 9. Application Manager provides Web UI to easily manage, deploy, start and stop Java applications running on Apache Tomcat 9 server.
But, we need to configure Managers Apps according to our requirement.
Define users and roles to access Apache Tomcat 9 Manager Web UI.
# vi /opt/tomcat/latest/conf/tomcat-users.xml
Add following lines just before </tomcat-users> tag.
   <role rolename="admin-gui"/>
   <role rolename="manager-gui"/>
   <user username="admin" password="admin" roles="admin-gui,manager-gui"/>
   <user username="ahmer" password="123" roles="admin-gui,manager-gui"/>
By default Application Manager is allowed to be accessed from localhost only.
We must edit the following files to let us access it from other machines.
# vi /opt/tomcat/latest/webapps/manager/META-INF/context.xml
Find and comment following lines of code.
  <Valve className="org.apache.catalina.valves.RemoteAddrValve"
         allow="127.d+.d+.d+|::1|0:0:0:0:0:0:0:1" />
After comment, it should be looks like this.
<!--
  <Valve className="org.apache.catalina.valves.RemoteAddrValve"
         allow="127.d+.d+.d+|::1|0:0:0:0:0:0:0:1" />
-->
Similarly, repeat the above step for following file.
# vi /opt/tomcat/latest/webapps/host-manager/META-INF/context.xml
Restart Apache Tomcat 9 service.
# systemctl restart tomcat.service
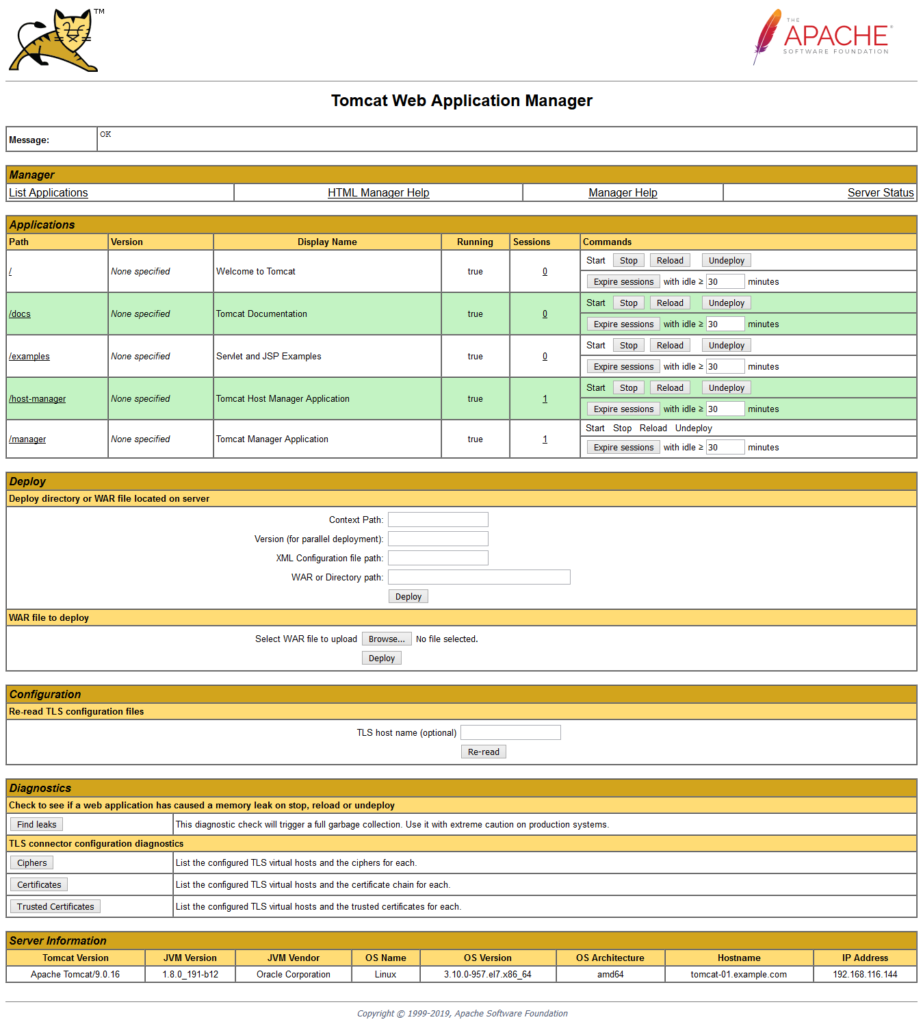
Browse URL http://192.168.116.144:8080 using a client’s browser.

Click on Server Status.

Go back and click on Manager App.

Go back and click on Host Manager.

Application Manager has been configured on Apache Tomcat 9 running on CentOS 7 server.
Conclusion:
In this configuration guide, you have learned, how to install Tomcat on CentOS 7 or other Redhat based Linux distros.


