In this guide, you will learn how to install iRedMail on CentOS 7 or other Redhat based Linux OS. #centlinux #linux #mailserver
Table of Contents
What is iRedMail?
iRedMail is an Open Source, full featured mail server solution that can save a lot of time for system administrators for complex configurations. iRedMail has support for all major Linux distributions. iRedMail uses other open source software like roundcube, SOGo groupware, Netdata, Nginx and MariaDB to add functionality to it’s mail server.
iRedMail is available in two editions, iRedMail (Free) and iRedMail Easy (Commercial). In this article, we are installing iRedMail (free) server on CentOS 7.
I don’t have found a good book on iRedMail server, therefore, I recommend the readers to refer to iRedMail Documentation for further reference.
However, if someone like to recommended a book, please share with me and I will include it in this article.
Environment Specification:
We have configured a CentOS 7 virtual machine with following specifications.
- CPU – 3.4 Ghz (2 cores)
- Memory – 2 GB
- Storage – 40 GB
- Operating System – CentOS 7.6
- Hostname – iredmail-01.example.com
- IP Address – 192.168.116.200 /24
Verify DNS Settings for iRedMail Server:
Connect with iredmail-01.example.com using ssh as root user.
Before configuring a private mail server, it is mandatory to have an Authoritative DNS Server. The DNS server must answer MX (Mail Exchange) queries, so the emails should be redirected to our iRedMail mail server.
If you have a DNS Server then add MX and A record of iredmail-01.example.com therein.
To verify our DNS settings for our iRedMail server correctly, we can use dig command.
# dig -t MX example.com

; <<>> DiG 9.9.4-RedHat-9.9.4-74.el7_6.2 <<>> -t MX example.com
;; global options: +cmd
;; Got answer:
;; ->>HEADER<<- opcode: QUERY, status: NOERROR, id: 40248
;; flags: qr aa rd ra; QUERY: 1, ANSWER: 1, AUTHORITY: 1, ADDITIONAL: 3

;; OPT PSEUDOSECTION:
; EDNS: version: 0, flags:; udp: 4096
;; QUESTION SECTION:
;example.com.                   IN      MX

;; ANSWER SECTION:
example.com.            3600    IN      MX      0 iredmail-01.example.com.

;; AUTHORITY SECTION:
example.com.            3600    IN      NS      dns-01.example.com.

;; ADDITIONAL SECTION:
iredmail-01.example.com. 3600   IN      A       192.168.116.200
dns-01.example.com.     3600    IN      A       192.168.116.4

;; Query time: 1 msec
;; SERVER: 192.168.116.4#53(192.168.116.4)
;; WHEN: Fri Sep 06 19:23:22 PKT 2019
;; MSG SIZE  rcvd: 121
From above output, we can see that, the MX and A records of our iRedMail server are properly added in DNS servers.
Stop Existing MTA service:
By default CentOS 7 installs Postfix as MTA (Mail Transfer Agent). We need to disable it before moving on to iRedMail server installation.
Stop and disable postfix.service.
# systemctl stop postfix.service
# systemctl disable postfix.service
Removed symlink /etc/systemd/system/multi-user.target.wants/postfix.service.
# systemctl mask postfix.service
Created symlink from /etc/systemd/system/postfix.service to /dev/null.
Disable SELinux on CentOS 7:
iRedMail server is not compatible with SELinux and it is recommended in it’s documentation to disable the SELinux before moving on to installation.
# setenforce 0
# sed -i 's/^SELINUX=.*/SELINUX=disabled/g' /etc/selinux/config && cat /etc/selinux/config

# This file controls the state of SELinux on the system.
# SELINUX= can take one of these three values:
#     enforcing - SELinux security policy is enforced.
#     permissive - SELinux prints warnings instead of enforcing.
#     disabled - No SELinux policy is loaded.
SELINUX=disabled
# SELINUXTYPE= can take one of three values:
#     targeted - Targeted processes are protected,
#     minimum - Modification of targeted policy. Only selected processes are protected.
#     mls - Multi Level Security protection.
SELINUXTYPE=targeted
Install EPEL Yum Repository:
iRedMail software requires some packages from EPEL (Extra Packages for Enterprise Linux) yum repository. Therefore, we are installing EPEL before moving forward.
# yum install -y epel-release
Install iRedMail on CentOS 7:
iRedMail 0.9.9 (Stable) version is available to download at iRedMail official website.
Download iRedMail software using wget command.
# cd /tmp
# wget https://bitbucket.org/zhb/iredmail/downloads/iRedMail-0.9.9.tar.bz2
--2019-09-06 19:40:13--  https://bbuseruploads.s3.amazonaws.com/e392fe45-c2cf-4346-aa1e-6c05d480ba75/downloads/fccd5eb1-6858-4e62-a228-c97b5619b5ed/iRedMail-0.9.9.tar.bz2?Signature=vhsfH3P5VJi1Jp4ptRKow53AXXg%3D&Expires=1567782055&AWSAccessKeyId=AKIAIQWXW6WLXMB5QZAQ&versionId=m_D7CqHrpm4t_pmJmxXSzqz9kk3V4qkd&response-content-disposition=attachment%3B%20filename%3D%22iRedMail-0.9.9.tar.bz2%22
Resolving bbuseruploads.s3.amazonaws.com (bbuseruploads.s3.amazonaws.com)... 52.217.37.172
Connecting to bbuseruploads.s3.amazonaws.com (bbuseruploads.s3.amazonaws.com)|52.217.37.172|:443... connected.
HTTP request sent, awaiting response... 200 OK
Length: 162676 (159K) [application/x-tar]
Saving to: âiRedMail-0.9.9.tar.bz2â

100%[======================================>] 162,676      133KB/s   in 1.2s

2019-09-06 19:40:24 (133 KB/s) - âiRedMail-0.9.9.tar.bz2â saved [162676/162676]
Extract downloaded zip file using tar command, to install iRedMail on CentOS 7.
# tar xf iRedMail-0.9.9.tar.bz2
Start iRedMail server installation as follows.
# cd iRedMail-0.9.9/
# bash iRedMail.sh
The iRedMail installer automatically installs required packages from CentOS 7 yum repositories and downloads iRedMail’s components from it’s website.

You are now at the welcome screen of iRedMail installer. Select Yes and press <ENTER>.

Provide the path to store the users’ mailboxes, if you have planned a different disk/partition to store the mailboxes. Otherewise, you can go with the default path as provided by the iRedMail installer.
Select Next and press <ENTER>.

The iRedMail installer is now asking to select a preferred web server. Select the Nginx using <SPACE> key.
Select Next and press <ENTER>.

Select a backend store for email accounts according to your preference. Since the administration is performed by a common iRedAdmin management console, therefore, you may not feel any big difference in functionality.
Select Next and press <ENTER>.

Because, we have select OpenLDAP as our backend store, therefore, it is asking for a LDAP suffix. Provide the LDAP suffix according to your environment.
Press <ENTER>.

Although, we don’t have selected MariaDB as backend store, but the iRedMail server still uses it internally. Therefore, provide a strong password for MySQL root user. Press <ENTER> to continue.

Provide your mail domain and press <ENTER>.

Provide a strong password for Mail Domain Administrator.
Press <ENTER> to continue.

Install any optional components based on your requirement.
Press <ENTER> to continue.
*************************************************************************
***************************** WARNING ***********************************
*************************************************************************
*                                                                       *
* Below file contains sensitive infomation (username/password), please  *
* do remember to *MOVE* it to a safe place after installation.          *
*                                                                       *
*   * /tmp/iRedMail-0.9.9/config
*                                                                       *
*************************************************************************
********************** Review your settings *****************************
*************************************************************************

* Storage base directory:               /var/vmail
* Mailboxes:
* Daily backup of SQL/LDAP databases:
* Store mail accounts in:               OpenLDAP
* Web server:                           Nginx
* First mail domain name:               example.com
* Mail domain admin:                    postmaster@example.com
* Additional components:                Roundcubemail SOGo netdata iRedAdmin Fail2ban

< Question > Continue? [y|N]
The iRedMail installer is confirming the settings, that we have provided in previous screens.
Enter y if you are happy with the settings.
The iRedMail installer will do all the work of installing packages and dependencies automatically.
********************************************************************
* Start iRedMail Configurations
********************************************************************
[ INFO ] Generate self-signed SSL cert (2048 bits, expire in 10 years).
[ INFO ] Generate Diffie Hellman Group with openssl, please wait.
[ INFO ] Create required system accounts.
[ INFO ] Configure Nginx web server.
[ INFO ] Configure PHP.
[ INFO ] Configure LDAP server: OpenLDAP.
[ INFO ] Setup daily cron job to backup LDAP data with /var/vmail/backup/backup_openldap.sh
[ INFO ] Configure MySQL database server.
[ INFO ] Setup daily cron job to backup SQL databases with /var/vmail/backup/backup_mysql.sh
[ INFO ] Configure Postfix (MTA).
[ INFO ] Configure Dovecot (POP3/IMAP/Managesieve/LMTP/LDA).
[ INFO ] Configure mlmmj (mailing list manager).
[ INFO ] Configure ClamAV (anti-virus toolkit).
[ INFO ] Configure Amavisd-new (interface between MTA and content checkers).
[ INFO ] Configure SpamAssassin (content-based spam filter).
[ INFO ] Configure iRedAPD (postfix policy daemon).
[ INFO ] Configure iRedAdmin (official web-based admin panel).
[ INFO ] Configure Fail2ban (authentication failure monitor).
[ INFO ] Configure Roundcube webmail.
[ INFO ] Configure SOGo Groupware (Webmail, Calendar, Address Book, ActiveSync).

*************************************************************************
* iRedMail-0.9.9 installation and configuration complete.
*************************************************************************

[ INFO ] Disable SELinux in /etc/selinux/config.
< Question > Would you like to use firewall rules provided by iRedMail?
< Question > File: /etc/firewalld/zones/iredmail.xml, with SSHD ports: 22. [Y|n]
[ INFO ] Copy firewall sample rules: /etc/firewalld/zones/iredmail.xml.
< Question > Restart firewall now (with ssh ports: 22)? [y|N]
< Question > Would you like to use MySQL configuration file shipped within iRedMail now?
< Question > File: /etc/my.cnf. [Y|n]
[ INFO ] Copy MySQL sample file: /etc/my.cnf.
[ INFO ] Enable SSL support for MySQL server.
[ INFO ] Updating ClamAV database (freshclam), please wait ...
ClamAV update process started at Fri Sep  6 20:56:33 2019
Downloading main.cvd [100%]
main.cvd updated (version: 58, sigs: 4566249, f-level: 60, builder: sigmgr)
Downloading daily.cvd [100%]
daily.cvd updated (version: 25564, sigs: 1751582, f-level: 63, builder: raynman)
Downloading bytecode.cvd [100%]
bytecode.cvd updated (version: 330, sigs: 94, f-level: 63, builder: neo)
Database updated (6317925 signatures) from database.clamav.net (IP: 104.16.219.84)
********************************************************************
* URLs of installed web applications:
*
* - Roundcube webmail: https://iredmail-01.example.com/mail/
* - SOGo groupware: https://iredmail-01.example.com/SOGo/
* - netdata (monitor): https://iredmail-01.example.com/netdata/
*
* - Web admin panel (iRedAdmin): https://iredmail-01.example.com/iredadmin/
*
* You can login to above links with below credential:
*
* - Username: postmaster@example.com
* - Password: Ahmer@1234
*
*
********************************************************************
* Congratulations, mail server setup completed successfully. Please
* read below file for more information:
*
*   - /tmp/iRedMail-0.9.9/iRedMail.tips
*
* And it's sent to your mail account postmaster@example.com.
*
********************* WARNING **************************************
*
* Please reboot your system to enable all mail services.
*
********************************************************************
Remove config file that was used by iRedMail installer, because it contains some critical information like Admin password.
# rm -f config
Restart our CentOS 7 server now using following command.
# systemctl reboot
Allow HTTPS service in CentOS 7 firewall.
# firewall-cmd --permanent --add-service=https
success
# firewall-cmd --reload
success
Verify iRedMail installation:
After restart, browse URL https://iredmail-01.example.com/mail/ in a client’s browser to access RoundCube WebMail.

Login using credentials as provided in above command.
- Username: postmaster@example.com
- Password: Ahmer@1234
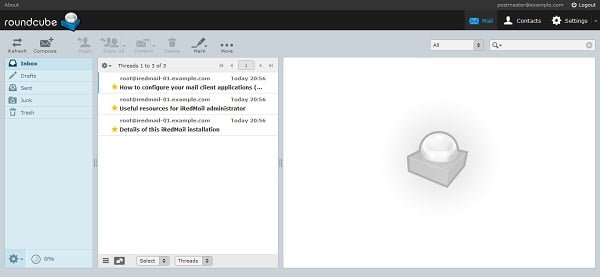
We are now at the inbox of postmaster@example.com user.
Now browse URL https://iredmail-01.example.com/sogo/ to connect to SOGo web client.
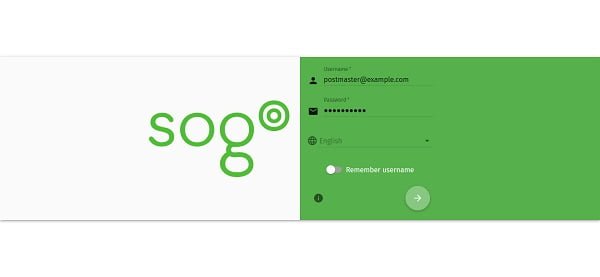
Login using same credentials that we have used above.
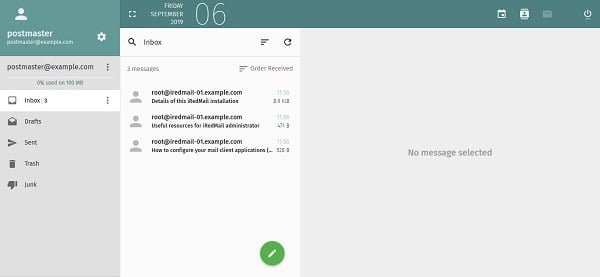
We reached at the inbox of SOGo web client.
Now browse URL https://iredmail-01.example.com/netdata/ to connect to Netdata monitor.
Login using the same credentials again.
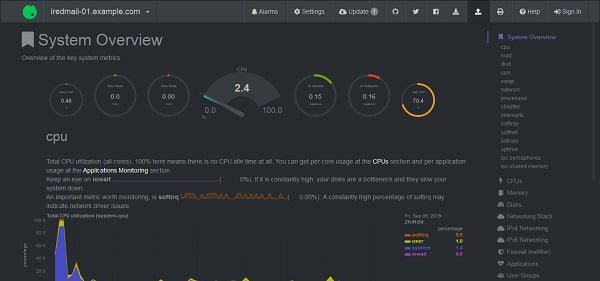
We are now at the dashboard of Netdata monitor.
Now browse URL https://iredmail-01.example.com/iredadmin/ to connect to iRedAdmin administration console.
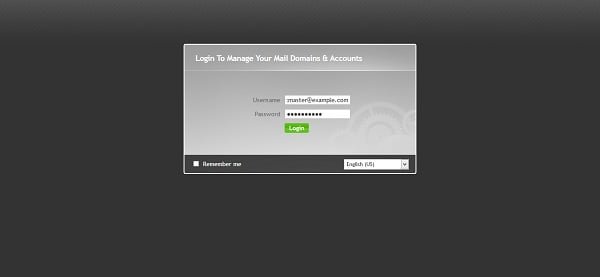
Login again using same credentials.
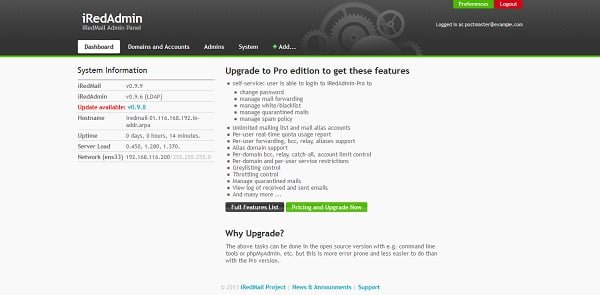
We are now at the dashboard of the iRedAdmin administration console.
All four components are working fine. We have successfully install iRedMail on CentOS 7.
Conclusion:
In this guide, you have learned, how to install iRedMail on CentOS 7 or other Redhat based Linux OS.


