Learn how to install Nagios Core on Ubuntu 20.04 with this step-by-step guide. Ensure efficient network monitoring by setting up Nagios Core properly on your Ubuntu system. #centlinux #linux #nagios
Table of Contents
What is Nagios Core?
Nagios Core is an open-source monitoring and alerting system designed to help organizations monitor their IT infrastructure, including systems, networks, applications, and services. It provides a centralized platform to ensure the availability, performance, and health of IT resources. Nagios Core is highly customizable and extensible, making it a popular choice for IT professionals and system administrators.
Key Features of Nagios Core
- Infrastructure Monitoring:
- Monitors servers, network devices, applications, and services.
- Tracks metrics like CPU usage, memory, disk space, network traffic, and more.
- Alerting and Notifications:
- Sends alerts via email, SMS, or other methods when issues are detected.
- Allows customization of alert thresholds and escalation policies.
- Extensibility:
- Supports plugins to monitor virtually any device, service, or application.
- Users can write custom scripts or use existing plugins to extend functionality.
- Web Interface:
- Provides a web-based dashboard for real-time monitoring and reporting.
- Displays status information, performance graphs, and historical data.
- Scalability:
- Can monitor small to large-scale environments with thousands of devices and services.
- Supports distributed monitoring for geographically dispersed infrastructures.
- Event Handling:
- Automates responses to detected issues, such as restarting services or running scripts.
- Logging and Reporting:
- Maintains logs of events and performance data for analysis and troubleshooting.
- Generates reports for capacity planning and compliance.
How Nagios Core Works
- Plugins: Nagios Core uses plugins to collect data from monitored devices and services. These plugins return status information (e.g., OK, Warning, Critical) to the Nagios server.
- Scheduling: Nagios Core schedules checks at regular intervals to ensure continuous monitoring.
- Notifications: When a problem is detected, Nagios Core sends notifications to configured contacts.
- Web Interface: Users can view the status of monitored resources, configure settings, and analyze data through the web interface.
Use Cases
- Server Monitoring: Track the health and performance of physical and virtual servers.
- Network Monitoring: Monitor routers, switches, firewalls, and other network devices.
- Application Monitoring: Ensure critical applications and services are running smoothly.
- Cloud Monitoring: Monitor cloud-based resources and services.
Nagios Core vs. Nagios XI
- Nagios Core is the free, open-source version with basic monitoring capabilities.
- Nagios XI is the commercial version with additional features like advanced dashboards, reporting, and configuration wizards.

Nagios Alternatives: Network Monitoring Tools
There are several alternatives to Nagios Core for monitoring systems, networks, and applications. Some popular alternatives include:
- Zabbix: An open-source monitoring tool that offers extensive features for monitoring servers, networks, and applications with a robust web interface and flexible alerting.
- Prometheus: An open-source systems monitoring and alerting toolkit designed for reliability and scalability. It uses a powerful query language (PromQL) and integrates well with Grafana for visualization.
- Icinga: A fork of Nagios, Icinga provides advanced monitoring features, a modern web interface, and supports distributed monitoring.
- Sensu: A flexible, scalable, and open-source monitoring tool that focuses on monitoring dynamic cloud infrastructure and applications, with support for various data sources and handlers.
- Checkmk: A comprehensive IT monitoring solution that can monitor networks, servers, applications, and cloud environments, with a user-friendly interface and powerful automation capabilities.
- Datadog: A commercial monitoring and analytics platform for cloud-scale applications, offering features for infrastructure monitoring, application performance monitoring, and log management.
- New Relic: A cloud-based observability platform providing full-stack monitoring, application performance monitoring, and real-time analytics.
- SolarWinds: A suite of monitoring tools for various aspects of IT infrastructure, including network performance, server performance, and application monitoring.
- Opsview: A comprehensive monitoring platform that supports monitoring of physical, virtual, and cloud environments, with a focus on scalability and ease of use.
- PRTG Network Monitor: An all-in-one monitoring solution that provides detailed insights into network performance, servers, and applications with customizable dashboards and alerting.
Each of these tools has its own strengths and is suited to different use cases, so the best choice will depend on your specific monitoring needs and environment.
Master Zabbix and take control of your network—enroll in our hands-on monitoring course today and become the go-to expert!

Environment Specification
We are utilizing a lightweight and efficient Ubuntu 20.04 LTS (Focal Fossa) virtual machine, specifically configured with minimal resources to optimize performance and reduce overhead. This setup is ideal for testing, development, or running lightweight applications. Below are the detailed specifications of the virtual machine:
- CPU – 3.4 Ghz (2 cores)
- Memory – 2 GB
- Storage – 40 GB
- Operating System – Ubuntu Server 20.04 LTS
- Hostname – nagios-01.centlinux.com
- IP Address – 192.168.116.239 /24
This configuration ensures that the virtual machine runs smoothly while consuming minimal system resources, making it perfect for scenarios where efficiency and simplicity are prioritized. Whether you’re setting up a development environment, testing new software, or learning Linux, this minimal Ubuntu 20.04 VM provides a solid foundation for your needs.
Mac Book Air Charger, 45W Magnetic Mag2 T-Tip Laptop Charger Suitable for Mac Book Air 11 inch and 13 inch After Mid 2012(Applicable to 2012-2017)
$18.99 (as of September 16, 2025 04:46 GMT +00:00 – More infoProduct prices and availability are accurate as of the date/time indicated and are subject to change. Any price and availability information displayed on [relevant Amazon Site(s), as applicable] at the time of purchase will apply to the purchase of this product.)Upgrade Ubuntu Software Packages
Connect with nagios-01.centlinux.com as a superuser by using a ssh client.
Execute apt command to update list of upgradeable software packages on your Ubuntu operating system.
sudo apt updateYou can now upgrade Ubuntu software packages by executing following apt command.
sudo apt -y upgradeInstall Nagios Core on Ubuntu 20.04
Nagios Core is readily available for installation on Ubuntu 20.04 LTS (Focal Fossa) through the standard APT (Advanced Package Tool) repositories, making it easy to set up and configure. While the version provided in the repositories may not be the very latest release, it is a stable and well-supported version that has been thoroughly tested to ensure compatibility with your Linux distribution. This ensures a reliable and hassle-free monitoring solution for your infrastructure.
By using the version available in the Ubuntu repositories, you benefit from seamless integration with the operating system, as well as access to security updates and patches provided by the Ubuntu maintainers. This makes it an excellent choice for users who prioritize stability and long-term support over having the absolute newest features. Additionally, the APT package manager simplifies the installation and management of Nagios Core, allowing you to focus on configuring and customizing your monitoring setup.
If you require the latest features or specific functionalities not available in the repository version, you always have the option to manually compile and install Nagios Core from the source code. However, for most users, the stable version available via APT is more than sufficient to meet their monitoring needs. Whether you’re managing a small network or a large-scale infrastructure, Nagios Core on Ubuntu 20.04 LTS provides a robust and dependable platform for keeping your systems in check.
Therefore, you can easily install Nagios on Ubuntu by using apt command.
sudo apt install -y nagios4 nagios-plugins-contrib nagios-nrpe-pluginDuring the installation of Nagios core, you may be asked to configure Postfix mail settings.
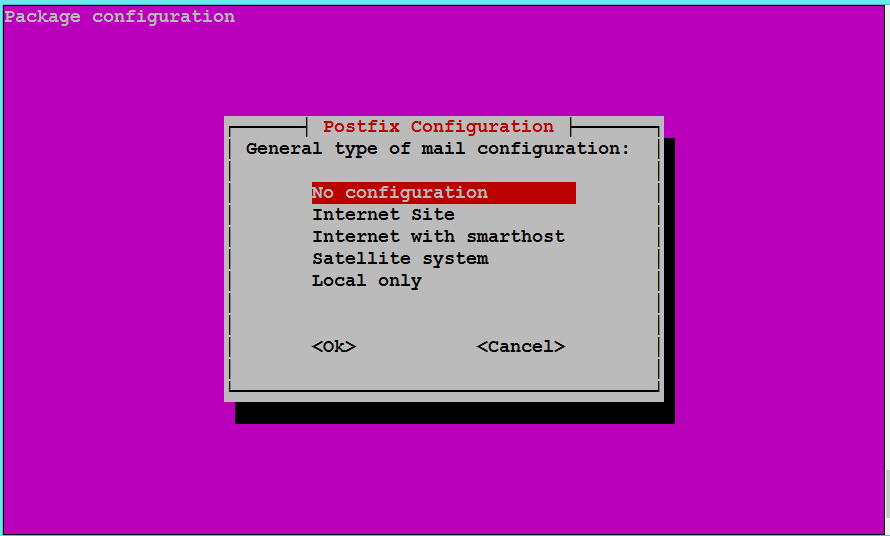
Select ‘No configuration’ option and click on ‘ok’ to complete setup.
Apache configuration file for Nagios uses following two apache modules. mod_authz_groupfile is used to allow or deny access to authenticated by group membership, and mod_authz_groupfile enables the MD5 digest authentication.
Therefore, you have to enable both of them by executing following command at Linux Bash prompt.
sudo a2enmod authz_groupfile auth_digestOutput:
[sudo] password for ahmer:
Considering dependency authz_core for authz_groupfile:
Module authz_core already enabled
Enabling module authz_groupfile.
Considering dependency authn_core for auth_digest:
Module authn_core already enabled
Enabling module auth_digest.
To activate the new configuration, you need to run:
  systemctl restart apache2
A default configuration file for Nagios Core is installed in Apache configuration directory. You can modify it according to your requirements.
Use nano text editor to edit Nagios configuration file.
sudo nano /etc/apache2/conf-enabled/nagios4-cgi.confLocate following lines in this file and comment them by inserting a hash (#) symbol at the start of line.
#Require ip ::1/128 fc00::/7 fe80::/10 10.0.0.0/8 127.0.0.0/8 169.254.0.0/16 172.16.0.0/12 192.168.0.0/16
#<Files "cmd.cgi">
#Require all    granted
#</Files>
Find and uncomment following line by removing the hash (#) symbol from start of line.
Require valid-userTo access Nagios web interface, you need a user credentials.
You can add a user in authentication file by using following command.
sudo htdigest -c /etc/nagios4/htdigest.users Nagios4 nagiosadminOutput:
Adding password for nagiosadmin in realm Nagios4.
New password:
Re-type new password:
Restart Apache service to apply changes that you have made so far.
sudo systemctl restart apache2Allow Apache service in Ubuntu ufw (Uncomplicated Firewall).
sudo ufw allow ApacheAccessing Nagios Core GUI
Open URL http://nagios-01.centlinux.com/nagios4/ in a web browser.
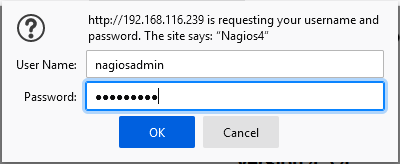
Login as nagiosadmin user.
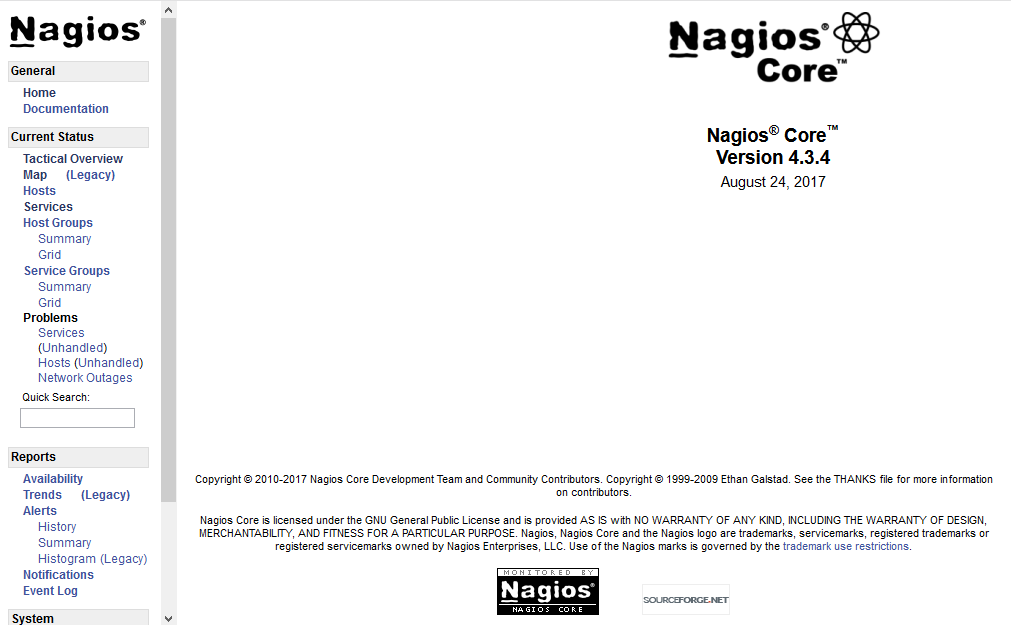
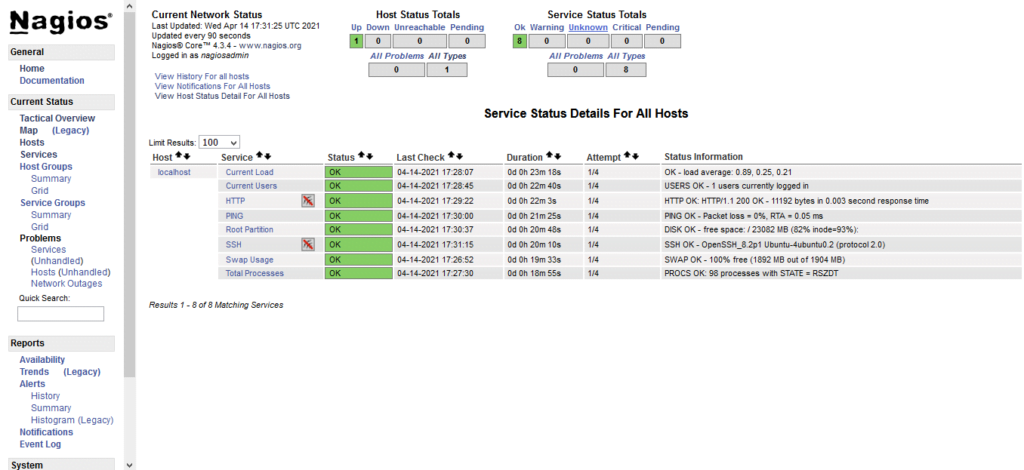
After successful login, you have reached at the Nagios default dashboard.
Click on ‘Tactical Overview’ from the left side menu.
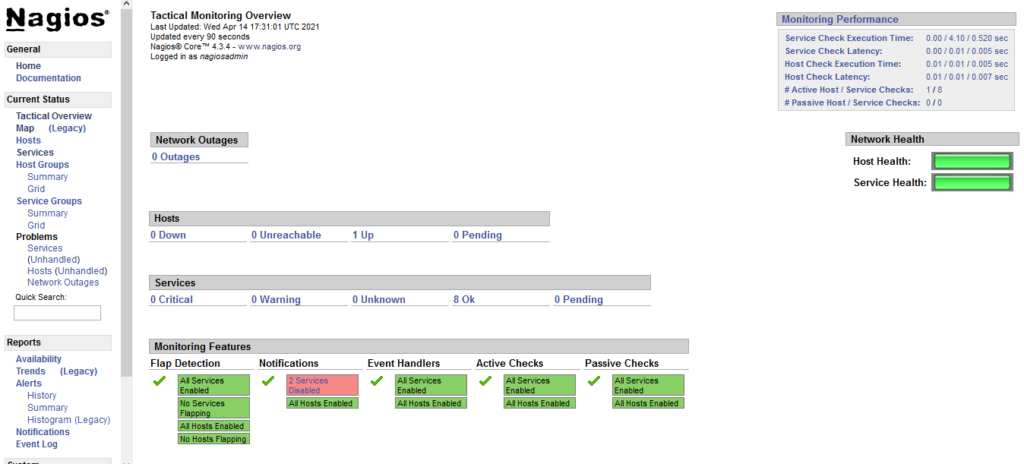
Click on ‘Services’ from the left side menu.
Office Docs Word Excel xlsx
$4.99 (as of September 16, 2025 19:09 GMT +00:00 – More infoProduct prices and availability are accurate as of the date/time indicated and are subject to change. Any price and availability information displayed on [relevant Amazon Site(s), as applicable] at the time of purchase will apply to the purchase of this product.)Final Thoughts
Setting up Nagios Core on Ubuntu 20.04 can greatly enhance your network monitoring capabilities, ensuring your systems run smoothly and efficiently. By following a structured installation process, you can leverage the powerful features of Nagios Core to keep your infrastructure in check and respond proactively to potential issues.
Your Linux servers deserve expert care! I provide reliable management and optimization services tailored to your needs. Discover how I can help!
Let’s ensure your network operates flawlessly with Nagios Core!


Leave a Reply
Please log in to post a comment.